Timeline functions
Double-click on a box to open the Timeline panel.

| (1) | The motion section contains two parts. The upper part is the timeline itself, with numbered frames. The lower part contains the keyframes of the timeline motion. For more information see the detailed explanation below. |
|---|---|
| (2) | The behavior layers section contains a list of behavior layer. |
| (3) | The details section contains the timeline edit button, the current frame indicator, and the general timeline scrollbar. |
The motion section
The upper part of the motion section contains the frame numbers, the start frame indicator (the green triangle), the end frame indicator (the red triangle), the current timeline edition frame (the blue line), the current timeline playback frame (the red line), and the range selector (the light blue area with purple corners).
You can move all elements of that area except numbers. To change the current selection range, click and drag in some empty area. You can then use the left purple triangle to move the selected frames (the keyframes and the surrounding empty time). You can use the right purple triangle to resize the selection, which will change its duration (and the speed of the contained movements).
The keyframes of the motion are represented by grey (or orange once selected) rectangles, and can be moved, copied or pasted. Clicking any part of the motion section will also move the current frame cursor of the timeline (the blue line), and set the robot to that position.
| Note: | If you use shortcuts to cut and paste keyframes, be sure to use the mouse to specify at what index you want to paste your keyframe. If the keyframe you have pasted is empty, this could mean that there is a conflict with contradictory joint values for the same motors at the same index. |
|---|
The Play button allows you to play only the motion of the timeline, and not the behavior keyframes. The Edit button opens the advanced timeline edition window, the Curve Editor.
The behavior layers
In the behavior layers section, each line correspond to a behavior layer. Within a behavior layer, you can have behavior keyframes. There can never be two keyframes within a given layer active at the same time, since there is only a single current frame for the timeline. To to have parallel behaviors, you can have several layers.
Click on + or - to add or delete behavior layers. On a behavior layer timeline, you can insert keyframes by double-clicking on the desired index or by right-clicking on it and selecting Insert keyframe. The Edit keyframe button in the right-click menu (or double-click on the keyframe) allows you to modify the name, picture and start index of a keyframe. You can also cut/copy and paste a selected keyframe on your behavior layer.
The details section
Click on the  button at the bottom to display the following window.
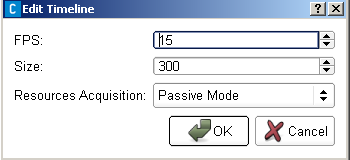
The window allows you to set the FPS parameter, the size of the timeline and also the Resources Acquisition.
| Note: | The Resources Acquisition setting should not be used as an improved solution is provided: the Resource Manager (see the Managing the resources between behaviors section for more information). |
|---|
button, the current frame of the timeline is indicated, when there is one.