Creating a movement with a real NAO robot to define the joints values
In the previous tutorial, we have seen that it is quite simple to create a movement from scratch with the motion window. Yet, there is another possibility in Choregraphe to create movements for NAO in a very intuitive way. You can use a real NAO robot to easily define joints values for your keyframes. Let’s see how it works.
Saving the head joints values
-
Open Choregraphe and connect to a real NAO robot.
> When you change the real NAO position, you can see that the virtual 3D NAO changes position too. Try to raise NAO's arm for example.
Wouldn't it be nice to use this feature to create position keyframes on a motion timeline ?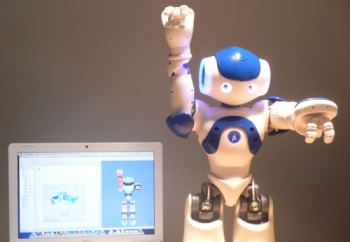
- Now, let’s say we want NAO to move its head up in the first keyframe and to keep its arms down. To do so, click on the first keyframe, then click on the head of the virtual 3D NAO to open the motion window.
- Move the real NAO robot head to the position you want (enslave must be off) and then click on the 2 record buttons of the motion window as in the picture below.
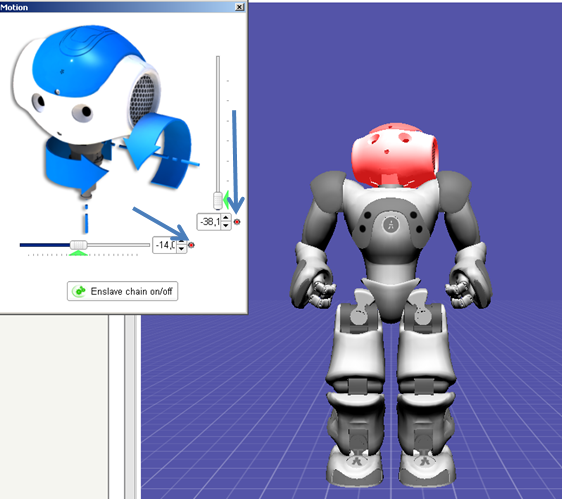
> The head joints values have been saved in the first keyframe.
Saving the arms joints values using the "Store joints in keyframe" option
- Move the real NAO robot arms to put them down.
Note: Enslave must still be off.
- Click on in the motion window.
> The robot doesn't move.
- Right-click on the first keyframe and select the option.
Note: This feature allows you to save the joints values of NAO: the joints of the whole body, the head, the arms or the legs.
- As we want to save the joints values of the arms, click on .
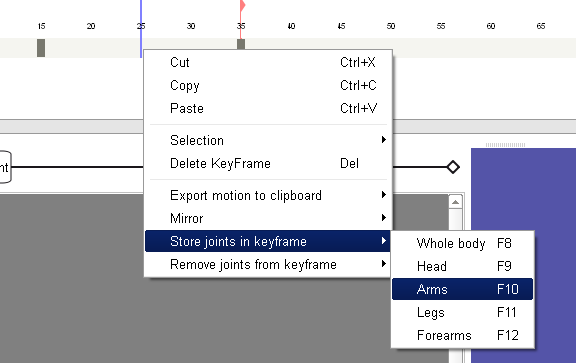
> The joints values of the arms have been saved in the first keyframe.
Raising the arms in a second keyframe
- Left click the motion timeline to change the current edition frame (the blue line).
> A second keyframe is displayed on the motion timeline.
- Move the real NAO robot arms to the position you want.
Note: The enslave option must still be off.
- Click on in the motion window.
> The robot doesn't move.
- Right click on the second keyframe and select .
> The joints values of the arms have been saved in the second keyframe.
Thanks to the option, we were able to save the values of 8 joints (4 joints per arm) in a keyframe in only a single click.
| Note: | When you right-click on a keyframe, the option allows you to easily remove the joints values that have been saved in a keyframe. You can choose to remove the joints values of the whole body, or only the values of the head, arms, legs or forearms. |
|---|