Agenda
Here you find sources and a procedure to make your own miniature-agenda. I always have problems getting a small one, as there is only one commercial agenda of this size, so I decided to make my own one.
You need a printer that can print double-sided A4 (or alternatively, a single sided printer and do a manual two-phase printing), a text editor that can read in rtf files, a stapler that can slam through a centimeter of paper, a paper cutting machine that can handle a centimeter of paper, two paperclips, a punaise and an hour of time. If the RTF file for the year you need is not available here, you also need Mathematica.
The procedure consists of the following steps:
1. download or generate an rtf file for the required year
2. edit the rtf file to align the front- and back-side on the print
3. print the agenda
4. roughly cut the pages and stack them
5. staple the pages together and cut the agenda to size
The easiest way is to just download the right year. Here are some for the year
2003, 2004, 2005
, 2006, 2007, 2008, 2009, 2010.
If you need one for another year, you need to generate it yourself.
Click here to download the mathematica file that can generate an agenda for any year you want. For the Mathematica 6 file click here.
In the mathematica file you see the firstdayofyear. Determine the first day of the year you need, and set the right value (you can for instance use the Unix 'cal' command for this). If the year you need is a leap year, you should set 'schrikkeljaar' to 'True'. Finally you will have to change the filename in the last sentence of the Mathematica file. Keep the '.txt' extension, otherwise Mathematica may not understand the format and complain. Note that the default directory is the Mathematica application folder. Now you can run Mathematica, and it will generate your rtf file. Finally, rename the .txt file to .rtf.
This editing is needed if the printouts on front and back side of the paper are not aligned properly. To test this, print the first two A4 pages (double-sided on a single A4 of course). The middle-of-paper sign'--' in the middle of the pages should fall together. Most printers are not aligned very good, and without correction you probably get a few millimeters displacement between front and back side.
To correct this, read the rtf file in into a word processor (I use Word5.1). Set up two-page layout, and adjust the print margins to correct for the print errors. The last time I printed, I could correct the errors by using unequal left and right print margins - so I did not need two-page layout.
Once you have corrected the print errors you can print the full agenda.
Now it's time to roughly cut the pages and neatly stack them up. Remember to put the cover first. I used overhead transparency for this, because it is very flexible where ordinary cover plastic is too stiff. Double-fold the pages on the middle of the '--' signs, and cut them in four slices. To align all pages nicely I use a punaise to make a hole just at the side of the '--' sign (Figure 1), and pile the pages up on a paperclip (Figure 2). You can also add some blank pages to make notes on.
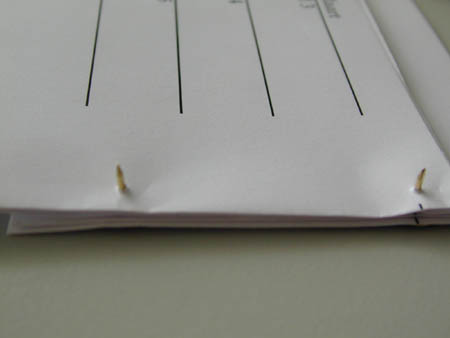
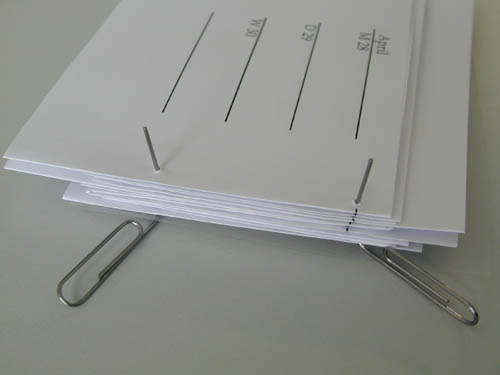
| 1. Pinching two holes in the pages with paperclips | 2. Piling up the pages neatly using two paperclips |
Once all pages and covers are in place, the pile can be stapled (Figure 3). Be careful about the place of the staples - you need to cut off part of the back, top and bottom of the agenda to get a neat straight edge, and you also want to keep away from the printed content. The last step is to cut the agenda to size. Cut straight edges and be careful to keep outside the printed area of the agenda and away from the staples. Be warned that you need quite heavy equipment to do these last steps properly.
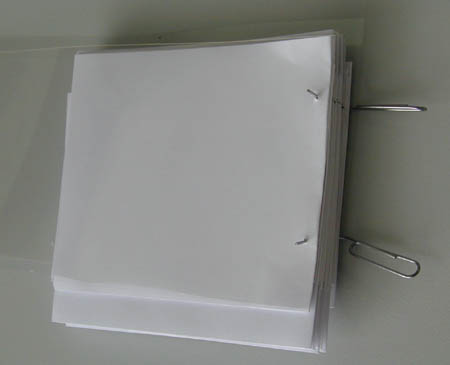
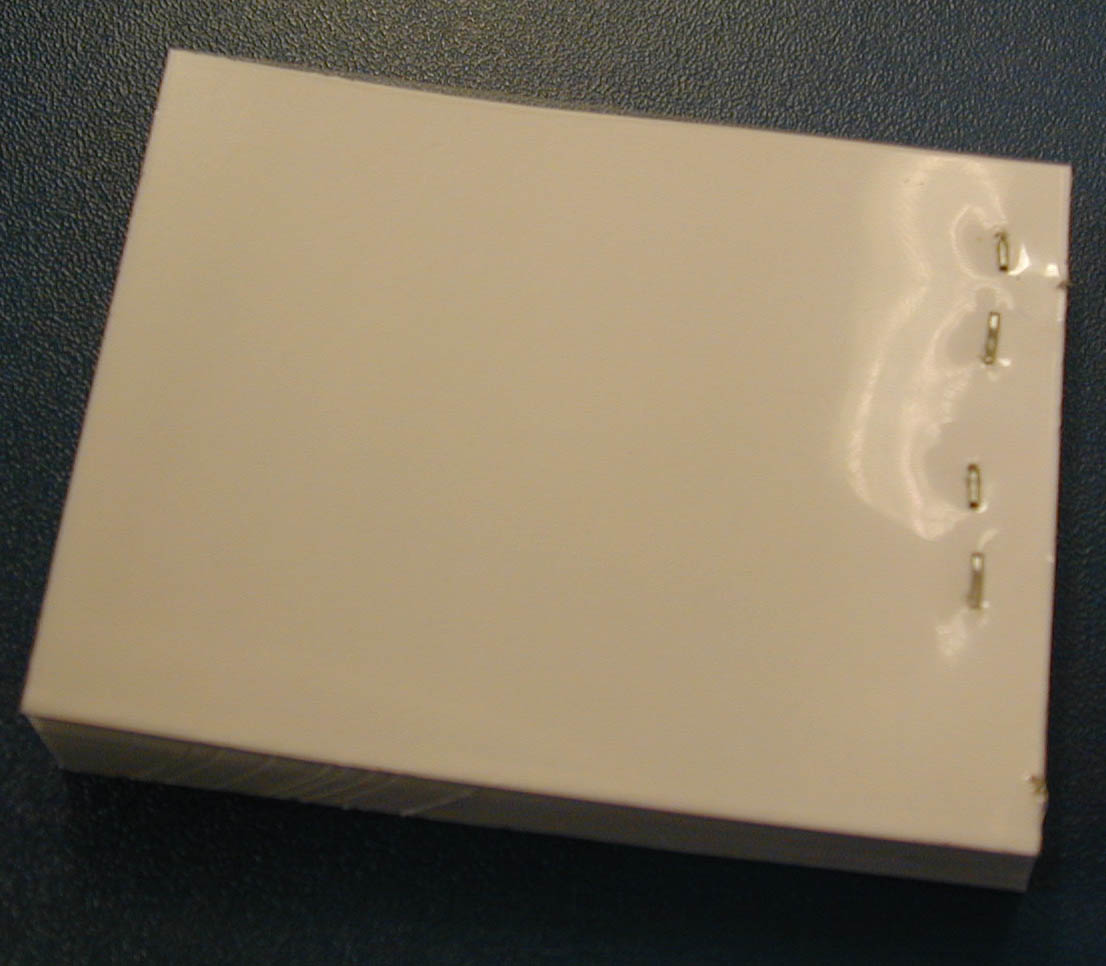
| 3. The full pile of papers | 4. The finished agenda after final cutting to size |
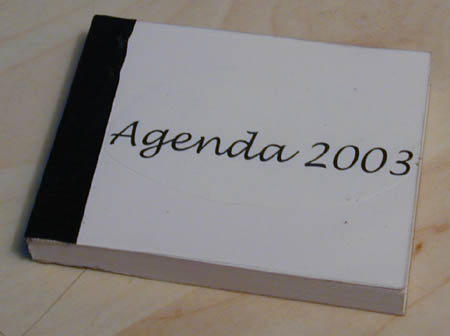
As a final touch, you can cover the back and staples with textile tape and paint the front page as you like.