Painting the Canopy
Up to now I have painted four canopies: one red, one metallic, one neon yellow with camouflage red blobs,
and one neon yellow with scales. (in historic order).
I discuss them in this order.
Red (summer 2000)
The big problem with painting this canopy is that there is hardly any primer for polypropylene available.
The
raptor newsletter 5 suggest to use spray primer designed for
automotive rubber bumpers, but this is quite vague (although a good hint in fact).
I found some primers on the internet, for instance
Polaqua 103 from ADMTronics.
But there was no price indication, and it was not clear whether this product
is delivered in a spray can or just in a plain liter can (or does it sell per gallon?).
Another possibility, closer to home (the Netherlands), was to use
Sikkens Plastoflex. However, this is available only for wholesale business,
and sells per liter at fl. 120 or so. A club member used this and is very
enthousiastic about it, but unfortunately he had nothing left.
A nearby paintshop was helpful in trying some primers, and we tried a spray can with
Dupli-color hard plastic primer
"adhesion promoter between hard plastics and the acrylic lacquer finish"
, as well as a few primers that have to be applied with a brush.
A primer abbreviated BU did not fasten at all, we could easily scrape it off with our nails.
Another primer abbreviated GW9 seemed to fasten better, but that was only because it
dried so slow... Once dry it came off as easily as BU. I also tried Praxis multiprimer,
also to be applied with a brush. Fastened slightly better, but still scraped off quite
easily. I can be short about applying with a brush: it gives stripes in the final result
and it is near impossible to apply the primer evenly because these primers are so thick,
so not recommended.
The hard plastic spray also came loose at places, but it fastened better than the other
primers. Furthermore the result looked much smoother. So I chose to use the spray can primer.
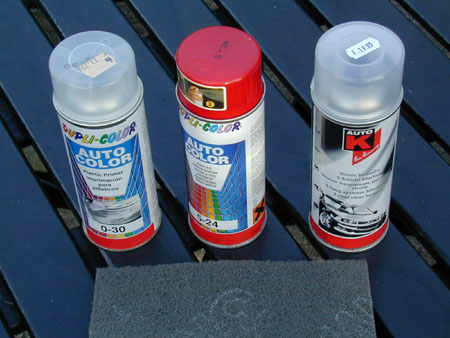
|
From left to right the primer, color spray and blank varnish.
In front the flexible 3M sanding 'paper'
|
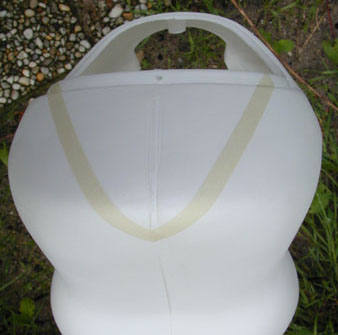
Stripe on the nose, to improve visibility of the orientation during flight.
The Dupli-color primer is invisible.
|
To improve attachment of the Dupli-color primer, I applied all preparation tips that I knew of:
first, I sanded the canopy with flexible 3M sanding paper. Next, I sweeped the canopy
through a gas flame (very short, nothing visible happens), a tip I got from someone working
in a printing office.
billm at runryder gave the following test for the "flaming" trick:
to check if the treatment is good here is the trick.
Dip the sucker in water. If the water sticks in nice sheet, you have a good treatment.
If the water beads up, poor or no treatment.
Finally I cleaned the canopy with thinner.
The primer then was applied. It had just rained, which is perfect to avoid dust on the paint.
After drying the primer, painting paper was applied to make a white
stripe on the front of my raptor. The smoothly rounded front of the raptor canopy
makes it very difficult to estimate orientation when flying half nose in: it often looks like
you're flying with the nose away from you.
The stripe is designed such that it increases the
difference between half-back and half-front view during flight as much as possible (while
still looking nice). When looking half from the back the stripe is not visible, but as the nose
comes in more and more becomes visible of the stripe. The stripe is slanted so that it gives also
a clue about orientation when partially visible.
Then several (6 or so) thin layers of paint were applied. The last
layers gave a nice, slightly rubbed, effect, but for a very polished result you'd better
stop after 4 or 5 layers. The painting paper was removed shortly after the last layer was
applied, because removal might be difficult once the paint is fully hardened.
To improve the
shininess and deepen the color, a blank varnish was applied. Leave it drying for
two days, the paint will come off very easily as long at it is not fully hardened!

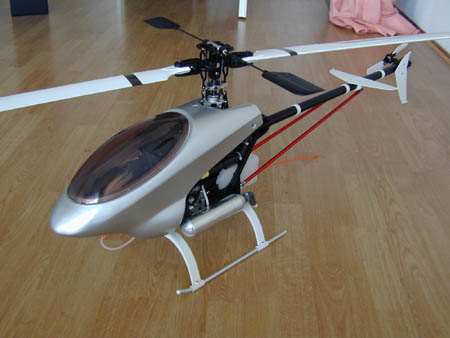
|
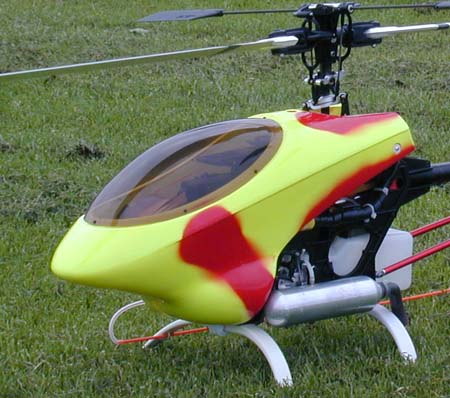
Nice photo of the red canopy on my Raptor 50. The paint is already on for two years here.
Notice the cut in front of the pipe, that once was needed for the hatori pipe.
|
|
Paint quality
After some 40 flights there are still no scratches on the paint. Only at the cutting edge
on top of the heli (where the roll connecting rods sometimes scrape along the canopy) and in the
starter hole some paint is scraped off. It comes off very nice, only very minute pieces come
off and this seems not to affect the strength of neighbouring paint.
After some 80 flights I noticed that the paint and farnish dissolve in alcohol, so
be careful not to spoil fuel on it. One or two very small (0.1mm or so) scratches have appeared
on the right side, probably the canopy hit something occasionally, and just above the exhaust pipe
on the left the iron silicon tube fasteners once hit the canopy during packing, making two 1mm scratches.
After more than 250 flights the paint is still on quite nicely. A few more scratches,
but the nose is still perfect. Inside the starter shaft hole the paint has gone.
The paint kept in good condition for over 2 years, so not bad!
It's now in its third year, and the surface is getting sticky near the exhaust pipe.
Can't clean it with alcohol as the paint will dissolve, so I am going to repaint it.
Metallic (end 2002)
In september 2002 it was time for a new canopy: the red one started to get sticky and dirty, and furthermore I still had
a hole at the left side that once gave space to the hatori pipe.
After trying some color schemes in Photoshop and checking other's paint jobs on the web,
I decided to try metallic. It seems no one has tried that yet, and it seemed nice.
Unfortunately it is hard to test the effect of metallic on the computer, so it
was a bit of a gamble.
Again I roughly used the same preparation as the first time, but this time I used
300 sanding paper to get rid of the glue seam on the nose and to sand the canopy.
Then the canopy was sanded again, with grid 600. (Although I was very careful, it showed
after the painting that very minor scratches were still visible. So sanding should
be done very very thorough. Check with bright, skimming light!).
After the sanding, the canopy gets a nice, velvet feeling, which probably gives most
of the support to the paint.
Again the gas flame trick was applied,
and then thinner, which I sprayed on this time using the refillable spray can.
After short drying,
three layers of the dupli-color primer were applied and then it was left drying
for half an hour.
For the metallic lacquer, I used a bright and clear
large-grain metallic, because that should be best visible at distances.
The metallic D953 paint was thinned with TPU123, at a 1:1 ratio.
I used 60cc lacquer and 60cc TPU.
The sprayer was
cleaned with thinner after the spraying was done.
Six or so layers of metallic were then applied.
The first layer gave some drops, I ended up removing the paint there completely
and repainting
that part, so be careful if you want to spray metallic.

|
From left to right the refillable spray can, D953 metallic lacquer,
TPU 123 special thinner, octoral H15 2K agent/catalyst, and octoral C60 blanc lacquer.
|
|
The plan was to use two-component octoral lacquer as a finish.
But the canopy never
was finished because the canopy did not look very nice. The paint was OK,
but somehow it does not fit with the other parts...
Maybe it's the white fins and blades, or the red tailboom support struts?
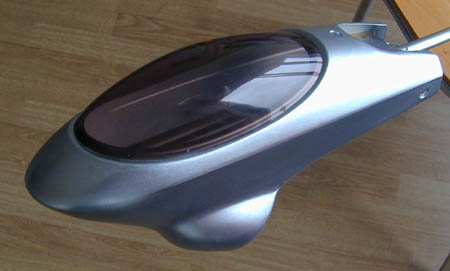
|
By itself, metallic looks OK - maybe a little too static.
|
But somehow it does not combine with the other parts...
|
Neon Yellow
So I removed the metallic again (just throw standard thinner on it and wipe it off),
and I now went for neon yellow with red dots, that seemed quite nice in Photoshop.
This looked much better (still have to paint fins and boom).
After the thinner cleaning action it could be sprayed with 6 layers or so neon yellow,
10 minutes between the sprays. The canopy was left drying for a night.
I wanted red blobs on it, and you need several layers of red for a good covering,
so I sticked on paper covering everything but the holes. I first applied a 'ring'
around the holes, so that the paint could get under the paper about 1 to 2 cm,
to get a nice smoothing-out effect. Then the rest of the heli was covered.
Then six layers of the red paint (remaining from the first paint job) could be applied.


Red needs multiple layers to cover. Spray is allowed to creep
a short end under the paper to get a smoothing-out effect.
For finish, the octoral 2-component lacquer was used.
This is mixed 2 parts of lacquer and 1 part agent, and I added an additional
10% of the TPU thinner (next time I would try with less thinner, I found the lacquer
too thin, but it flew out OK).
Again 10 minutes between layers, and afterwards cleaning
the refillable sprayer with thinner.
The yellow canopy has many hundreds of flights on it now, and it was soaked with
oil in hundreds of inverted hoverings and backwards inverted flights.
The lacquer has proven to be excellent:
Just wipe the oil off after flying and looks as new again, not a single scratch.
After some 500 flights, there are a few small scratches, and the sharp edge to the inside
(that is, where the lacquer and paint stops)
is becoming a bit damaged.
Next time I surely will use this lacquer again. Only next time I think I will try
an airbrush instead of the difficult covering with paper with holes.
Impression of final result. High-polish wet-looking effect and deep colour.
Neon with scales
In august 2006 the edges around the rubber mount grommets of the neon yellow design were starting
to crack a bit, and I found it was time for a better design as well.
I thought to start with an easy design with scales on top of a neon yellow background.

I had no airbrush experience but estimated this would be easy (....) and the people
I bought airbrush equipment from confirmed that this was do-able for a beginner (...)
I bought some airbrush equipment: a Fenghua Bida Machine Manufactore Co., Ltd
BD-135 and F-3 mini spray gun. This stuff is sold under the brandname "Black Bull" by
macaja and
detectorshop. After a few days of training
(thanks to Don Johnson for his online lessons)
and some tips from the airbrush shop I was ready to start on the canopy.
First the canopy was prepared as before. I taped off all edges, and around the rubber mount grommets, hoping that by not painting
these problem areas the canopy will last even longer.
Then neon yellow was applied from a spray can.
Then I used the airbrush to set the scales.
At this time I found that LOTS of masks were needed to prevent overspray coming
on the neon yellow and to separte the two sides of each scale. This is what made this job MUCH harder than anticipated.
Also I found that the neon colors really need a WHITE background, making it necessary to spray the
scales in white on top of the neon before applying the desired color.
For the cyan part of each scale as well as the black and white detail lines
I used schmincke aero color professional. The green part of each scale is using thinner-based
neon green from the local paint shop.
There are 18 scales on this design, and it took me a full day to set the white alone. The same time
was again needed for the cyan, etc etc. If I would calculate a per-hour fee this
canopy would be quite pricey :-o
As a final touch I sprayed on a very light touch of metallic, only visible in bright sunshine.
Very hard to capture on photo.
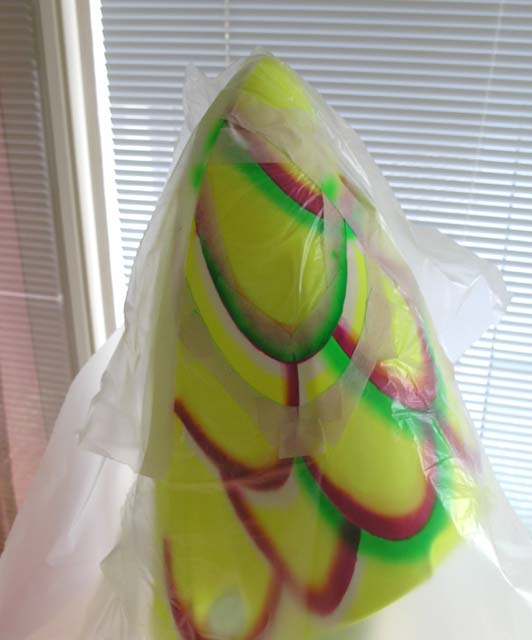
mask ready to set green side of a scale. Note the barely visible white grounding for the green
The lacquer came out nicely, I had a slight orange peel effect on the previous canopy
and it started to appear again
but this time I kept spraying longer which worked out. Very high gloss, very much like a glass window.
The photo shows final result, which is very close to what I designed. Only the
scales are quite a bit thicker than designed, I should have set a less wide part with white
enabling thinner scales with more run out.
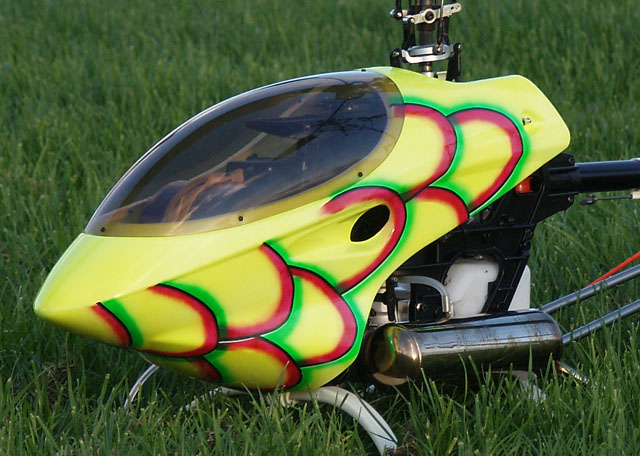
a little bit from the front.

Detail where the subtile metallic becomes visible when the light
falls just right
For more painting tips you can also look at the
site of Michael Prewitt, justcanopies and
CanopyFx.
You can buy painted canopies a.o. at JustCanopies,
CanopyFx,
brayson and Arizona heli.
© W.Pasman, 28/8/6