Blade Balancing
Here comes a do-it-yourself way of balancing. No need for expensive balancing mechanisms,
if you like to fiddle around a little!
If the blades are not the same weight, or have different center of gravity,
you have to balance them. I thought this was not that critical, but
it makes sense to have them the same down to the millimeter/centigram (see
my page on this). Good blades usually have
exactly the same center of gravity, but often are not exactly the same weight.
See my documentation of the blades.
An easy way is to first put tape on the near and/or far end of the blades to
bring the center of gravity to the same place, and then add tape to the
center of gravity of the lightest blade to make them the same weight.
More advanced (requiring less tape) is to do the two steps at once, by putting tape on only one
place on every blade. For this is it convenient to reverse the order, and
first find out how much tape is required to balance the weights of the blades.
Next you have to find out where to attach this amount of tape to balance
the COGs.
First you have to find the Center of Gravity (COG) of both blades. Place the blades perpendicular on a sharp edge, eg an iron ruler or a razor blade if you are freak worrying about that last micrometer (careful not to cut into the blades!) Move the blade around until it just hangs still, or falls down only after a second or two. The line where the edge touches the blade is the COG. Mark the COG with a small mark with a waterproof felt-pen (still, you can easily rub this off with your finger, but if you have other than the standard raptor blades maybe it's a better idea to use something else to mark).
(More accurate, for the engineers: the COG is on this line. Here we are adjusting only the spanwise COG, not the chordwise COG, and therefore we require the blade to lay perpendicular to the edge. If anyone knows how to balance the chordwise COG in a simple way without advanced expensive mechanisms and also can explain why this is important, I would really like to hear it!)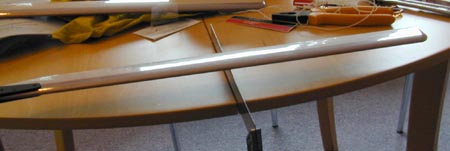
The COG showed about 4 mm apart. Last year I decided not change that, but after I did some
calculations I thought it better to correct.
Put a 4mm bolt through the two blade holders, such that the blades are put
flat against each other, so that you can compare both COGs.
if the COGs are at different points, put cellotape on the blades to move the COG.
put cellotape to the tip to move the COG outwards, or near the blade holder to
move it inwards. Avoid the area very close to the tip, and prefer taping the area
near the blade holder over the tip area, as the tips of the blades should be kept as similar
as possible. Remove the old COG markers and measure again.
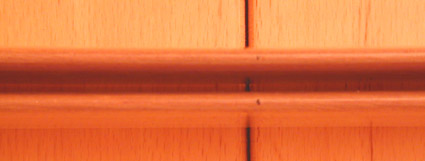
If you end up with something like this, I think you can be very satisfied.
Back in 2000, I had no precision scales, so I took the blades to the local Praxis and weighted them on their screw-scales. They showed both 99 ± 1 grams. Again, now I know that more precise balancing is required, and actually it is quite easy to make a precision balance yourself. Using that, balancing down to 0.1g is possible.

The following shows how to check if everything went roughly OK. This is NOT
the procedure to balance, only for checking if you made no gross mistakes.
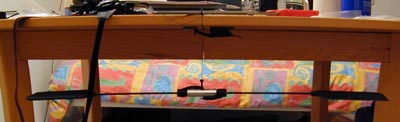
To check overall balance, I joined the two blades
with a screw and hang the screw under my table. Attach the wire close (eg 5 mm) to the
upper part of the blades, that will make the balance most sensitive.
This showed OK. I think I would bring the rotation point closer to the blades now, because that
increases the accuracy of this check. Be sure that the rotation point is exactly in the middle,
otherwise this checks will fail!

For the flybar a similar procedure. However you can't use the precision balance now...
So what I did was to attach a wire to one of the holes and hang it under the table.
Again, attach the wire as close as possible to the hole for max sensitivity, and assure
that the wire is in the middle and not on one side of the hole.
Mine were not perfectly in balance,
it showed that the distance to the center of the paddles was not exactly the same. I just
turned one of the paddles a full turn to get that distance equal, which brought them also
into balance. Also be careful to have no space between the flybar control arm and the seesaw hub.
(the central metal part).