Difference between revisions of "VRET pyQt"
(→Designer) |
(→Designer) |
||
| Line 40: | Line 40: | ||
''' Naming conventions ''' | ''' Naming conventions ''' | ||
| + | [[Image:WidgetNaming.jpg]] | ||
:Like every Gui editor Designer names it's widget by just nummering them this isn't useful when you want to work with these widgets later on. The way you work with the generated .py files a nice convention to stick with is to name every widget as a coombination of it's function and type and starting every word with a capital letter. so a dropbox on a widget to select an scenario will be 'ScenarioBox'. Starting with a capital letter will make sure you can make a destinction between your own variables in your code and Designer generated objects in your ui. | :Like every Gui editor Designer names it's widget by just nummering them this isn't useful when you want to work with these widgets later on. The way you work with the generated .py files a nice convention to stick with is to name every widget as a coombination of it's function and type and starting every word with a capital letter. so a dropbox on a widget to select an scenario will be 'ScenarioBox'. Starting with a capital letter will make sure you can make a destinction between your own variables in your code and Designer generated objects in your ui. | ||
:Naming your main widget every widget you create starts with a base (the main widget) you should name this widget the same as the final name you want to use for that class in your code. so a widget for scenario selection named ScenarioSelectionWidget.py should be named in the designer as ScenarioSelectionWidget and saved as Ui_ScenarioSelectionWidget.ui | :Naming your main widget every widget you create starts with a base (the main widget) you should name this widget the same as the final name you want to use for that class in your code. so a widget for scenario selection named ScenarioSelectionWidget.py should be named in the designer as ScenarioSelectionWidget and saved as Ui_ScenarioSelectionWidget.ui | ||
Revision as of 13:27, 11 December 2009
Contents
Why pyQt or Qt
Tutorials
Tips
Arguments in callback functions
def callBackFunction(self, argument):
- pass
def createCallBackFunction(self,argument):
- def function():
- self.callBackFunction(argument)
- return function
self.connect(self.buttonObject, QtCore.SIGNAL('clicked()'),self.createCallBackFunction("argument"))
Designer
Starting
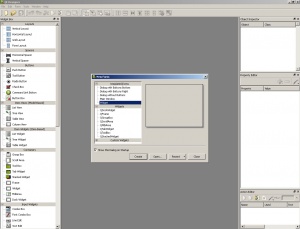
- When you start the Designer program you get a popup where you can select what kind of widget you want to create. Most of the time you just want a empty QWidget or QFrame. You can also open widgets you have created and saved to a .ui file.
First step
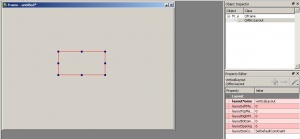
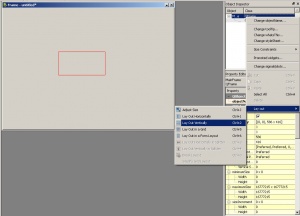
- The first step on your empty widget is to put a layout on it by dragging and dropping it from the left menu onto the widget. After doing this you have to fix the layout onto that widget by selecting the widget in the right menu and right clicking it and select Layout> from the pop up menu. In this sub menu you select the kind of layout you put onto the widget and by doing this the layout box will fill the complete widget (except for some borders). After this step you can drag and drop any layout or widget from the left menu onto the widget and it will be placed and sized automatically.
Widget options
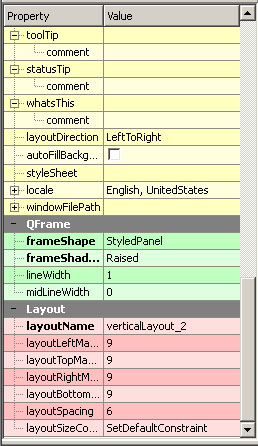
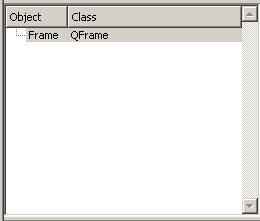
- Every widget has it's own specific options to manipulate it's looks or working. These can be found in the right menu with all the general options for a widget like size policy's. In this Image i created a empty QFrame and you can see the QFrame specific options like frameShape and frameShadow.
Layout options
- Every layout has it's own options for spacing and margings these can be found also in the right menu when you have the layout or a widget with layout selected.
- Like every Gui editor Designer names it's widget by just nummering them this isn't useful when you want to work with these widgets later on. The way you work with the generated .py files a nice convention to stick with is to name every widget as a coombination of it's function and type and starting every word with a capital letter. so a dropbox on a widget to select an scenario will be 'ScenarioBox'. Starting with a capital letter will make sure you can make a destinction between your own variables in your code and Designer generated objects in your ui.
- Naming your main widget every widget you create starts with a base (the main widget) you should name this widget the same as the final name you want to use for that class in your code. so a widget for scenario selection named ScenarioSelectionWidget.py should be named in the designer as ScenarioSelectionWidget and saved as Ui_ScenarioSelectionWidget.ui
Ui to Py
- PyQt comes with a little .bat file named pyuic4.bat that can convert your Ui file into an Py file. The command line for this is 'pyuic4.bat widget.ui > widget.py'
Using the generated .py file
- If you followed naming conventions you should have Ui_WidgetName.py files you need to couple this code to your functional code and still keep the flexibility to make changes in the Designer to update your gui. The easiest way to do this is by making a new .py file with the same name except for the Ui_ so WidgetName.py. These files then extend the base type of the widget and the Ui_ file like
class WidgetName(QtGui.QWidget,Ui_WidgetName):
- def __init__(self,parent)
- QtGui.QWidget.__init__(self,parent)
- self.setupUi(self)
- def __init__(self,parent)
This way you keep the flexibility to use the Designer for changes and also be able to influence the gui with your code.
Using Custom widgets
- If you want to use custom widgets in the Designer you can promote base widgets you dragged onto your workspace in Designer by clicking on them with your right mouse button and selecting promote>> there you can select the name to promote too don't forget too check the global import and using the capital letters conventions also in the .h filename and then all the imports will be correct in the python code.
